How to Get Lightroom Classic on iPad: A Comprehensive Guide

Adobe Lightroom Classic is a program that I really enjoy working with because it helps me make edits to photos easily. The program is very powerful for beginners and professionals. Although it was primarily developed for computers, I tried using Lightroom Classic on iPad to allow myself more opportunities to work.
In this article, I’ll show you how to get Lightroom Classic on iPad. I’ll tackle common problems and give step-by-step instructions. I am here to help you with creating, curating a photo gallery, or simply editing, especially if it means taking advantage of the iPad’s screen.
By the end, you’ll know how to make the most of Lightroom Classic on iPad, boosting your workflow and creativity wherever you are. Let’s dive in!
Why Use Lightroom Classic on iPad?
Among several photo editing programs, Lightroom Classic is one of the most sophisticated and popularly used in photography. On the other hand, as smartphones become more popular, some photographers wonder how to use Lightroom Classic on their iPads. Among the values of using Lightroom Classic on iPad are the following:
- Portability: You can edit your photos from every corner of the world without needing an office computer or a laptop; more importantly, you do not have to be physically in the office.
- Convenience: Ease of Use Photo libraries and the editing workflow are all available and can be done on one device.
- Continuous Syncing: Any edits you make will automatically appear on all other devices, saving time and increasing the workflow’s consistency and effectiveness.
Can You Run Lightroom Classic on iPad?
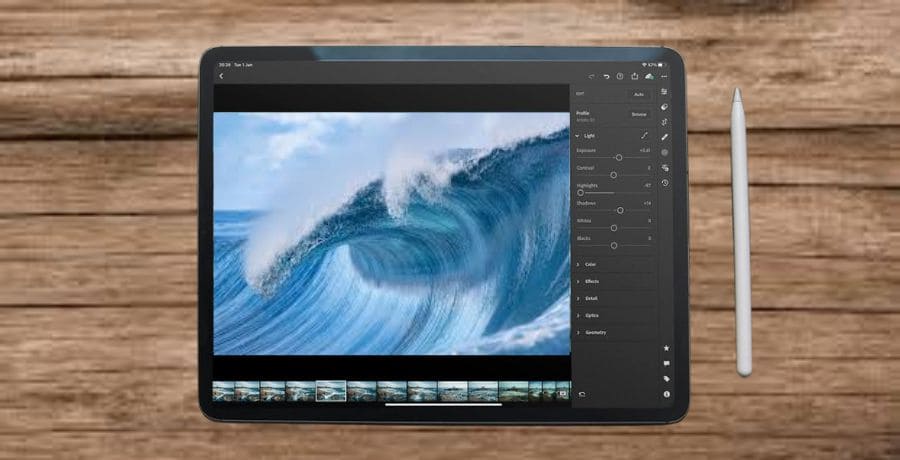
Lightroom Classic isn’t directly available on iPad. Instead, the iPad uses Lightroom Mobile, which doesn’t directly sync with Lightroom Classic. I work around this by syncing Lightroom Mobile to the Adobe Cloud and syncing the Adobe Cloud with Lightroom Classic.
This helps me use my iPad Pro as an extended device for my Master catalog in Lightroom Classic to work with pictures and reflect all changes in my master catalog.
Method 1: Use Adobe Lightroom for iPad
Although Lightroom Classic is unavailable on iPad, Adobe offers a separate application, Adobe Lightroom for iPad. This application is specifically designed for mobile devices and offers an easier editing experience.
Pros:
- Native Application: Adobe Lightroom for iPad is a native application that is optimized for iPad’s touch interface.
- Continuous Sync Your edits will be synced across all devices including your desktop and laptop.
Cons:
- Limited features: Adobe Lightroom for iPad does not offer certain features with Lightroom Classic.
- Another Interface The interface is made to be compatible with mobile devices. It might take a while to get used to it before it becomes suitable for Lightroom Classic users.
Method 2: Use Cloud-Based Services
Another way to access Lightroom Classic on your iPad is by using cloud-based services that allow remote access to your desktop or laptop.
Pros:
- Full Access: Access the full range of features in Lightroom Classic.
- Familiar Interface: Use the familiar Lightroom Classic interface on your iPad.
Cons:
- Internet Connection Required: You need a stable internet connection to access your desktop or laptop remotely.
- Performance Issues: Performance may be affected by internet connectivity and remote access.
Method 3: Use Third-Party Apps
There are several third-party apps that allow you to access your desktop or laptop remotely, giving you access to Lightroom Classic on your iPad.
Pros:
- Full Access: Access the full range of features in Lightroom Classic.
- Familiar Interface: Use the familiar Lightroom Classic interface on your iPad.
Cons:
- Internet Connection Required: You need a stable internet connection to access your desktop or laptop remotely.
- Performance Issues: Performance may be affected by internet connectivity and remote access.
Syncing Lightroom Classic with iPad
To sync your Lightroom Classic workflow with your iPad, you’ll have to use Adobe’s Creative Cloud. Here’s how:
- Create an account on the Creative Cloud Account: If you don’t have one created, you should create one to access your files and edits across all devices.
- Uploading Your Documents Transfer your data into Creative Cloud, ensuring they’re accessible via your iPad.
- Utilize Adobe Lightroom for iPads to access and edit your documents.
- Synchronize Your Edits Your edits will be synced to all platforms, ensuring your workflow is consistent.
Watch This Video on Syncing Lightroom Classic with iPad
If you require a more visual demonstration of how to sync Lightroom Classic with your iPad, go ahead and watch this video. It also describes how to organize your workflow in such a way that your edits and files are in sync on all devices that you use.
Video Title: Streamline your Lightroom workflow between your iPad and Mac (Lightroom + Lightroom Classic)
Creator: [Robin Férand]
Watch the video here.
Tips for a Seamless Lightroom iPad Editing Workflow
To get the most out of your Lightroom iPad editing workflow, follow these tips to ensure a seamless and efficient editing experience:
1. Use a Stylus
Invest in a stylus to improve precision and accuracy when editing on your iPad. A stylus can help you make more precise adjustments and selections, especially when working with small areas of an image.
2. Take Advantage of Touchscreen Features
Use gestures and touchscreen features to streamline your editing workflow. For example, use the “tap and hold” gesture to access the Loupe view, or pinch to zoom in and out of an image.
3. Organize Your Files
Organize your files and folders to ensure easy access and navigation on your iPad. Use collections, folders, and keywords to categorize your images and make them easily searchable.
4. Master the Art of Gesture-Based Editing
Familiarize yourself with the gesture-based editing features in Adobe Lightroom for iPad. For example, use the “swipe left” gesture to undo an edit, or the “swipe right” gesture to redo an edit.
5. Use the Power of Presets
Use presets to streamline your editing workflow and achieve consistent results. Create custom presets or use built-in presets to apply a consistent look to your images.
Unlock Your Creative Potential with Our Presets
Ready to take your editing to the next level? Browse our collection of expertly crafted presets and discover new ways to enhance your images.
6. Leverage the Cloud
Leverage the power of the cloud to access your files and edits from anywhere, at any time. Use Adobe’s Creative Cloud to sync your files and edits across all devices.
7. Edit in a Logical Order
Edit your images in a logical order to ensure a seamless workflow. For example, start with global adjustments, then move on to local adjustments, and finally, apply any finishing touches.
8. Use the iPad’s Camera
Use the iPad’s camera to capture new images and import them directly into Adobe Lightroom for iPad. This can be especially useful for capturing reference images or for creating new content on the go.
9. Stay Organized
Stay organized by regularly backing up your files and edits, and by keeping your iPad’s storage organized. This will ensure that you can access your files and edits quickly and easily, even when working on the go.
In the end, even though Lightroom Classic is not natively accessible on iPad However, there are solutions to use this powerful editing program from your smartphone. You can utilize Adobe Lightroom for iPad, cloud-based services, or other third-party apps to synchronize your workflow across different devices and edit your images while on the move. Take advantage of the touchscreen features, arrange your photos, and use the stylus to enhance the editing experience.
What’s your preferred method to edit pictures using your tablet? Let us know in the comments section below!
Can I use Lightroom Classic on iPad Pro
Lightroom Classic isn’t available on iPad, but you can use Lightroom Mobile on the iPad Pro. Sync Lightroom Mobile with Adobe Cloud, which then syncs to Lightroom Classic on your desktop.
Is the iPad good for editing in Lightroom?
Yes, the iPad is great for editing in Lightroom. With a touch interface, Apple Pencil support, and powerful performance, it offers a seamless editing experience on the go.
Is the iPad good for editing in Lightroom?
Yes, the iPad is great for editing in Lightroom. With a touch interface, Apple Pencil support, and powerful performance, it offers a seamless editing experience on the go.


